Canning 101: Pickled Green Beans
I have grown accustomed to seeing (and eating) a wide variety of unexpectedly-pickled things while living in Japan and Korea, but it was tasting homemade pickled rhubarb (and other pickled things, like watermelon rind) at Resurrection Ale House in Philadelphia last summer that made me want to try it for myself. As if I could ever reproduce that rhubarb…
So last summer I took a canning and pickling class, and this post is Part 2.* You can read all about my strawberry jam-making adventures and what I learned about canning (just the basics) in my first Canning 101 installment here:
(Part 1) Canning 101: Strawberry Jam
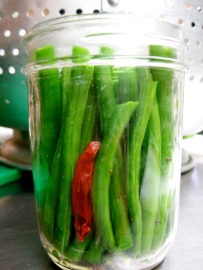
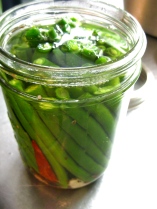
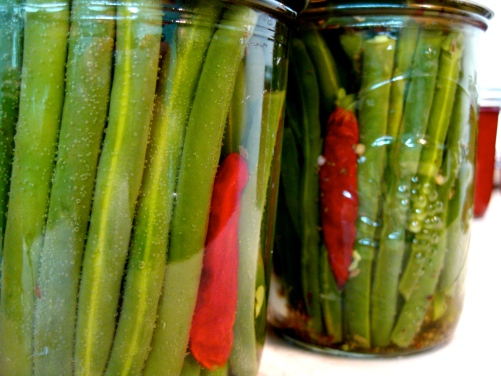
The most exciting part of the class for me was the lesson in DIY pickles. Our group pickling project was pickled green beans. Crunchy, vinegary, and a little bit spicy, these pickled green beans make the perfect snack, or appetizer accompaniment (or gift!). They’re an awesome way to preserve green beans, too, if you find yourself with an excess of string beans and you want to make them last for months. I don’t have a garden or a green thumb, though, so I’m not in it for the preservation part, but for the tangy pickled homemade snacks.
Next up, I need to get myself some hot water gloves for canning, and my own set of canning jars and screw rings**, and I hope to be pickling away later this summer. Tomolive-style mini green tomatoes are at the top of my list, followed by pickled rhubarb, Korean-style pickled cucumbers (oi kimchi), and then maybe pickled daikon and carrots for Banh Mi.
A final note: did you know that it’s also possible to make “refrigerator pickles” simply by pouring a brine over some vegetables, like fresh cut cucumbers, and leaving them in the fridge for 24 hours? Of course they won’t be preserved for as long this way– they are best eaten within a week or two– but it’s a nice pickling shortcut to know about, especially if you don’t have the time or the vegetable quantities for a hot water canning bath pickle-fest. Our Canning 101 teacher explained that you can even make Refrigerator Pickles simply by tossing some fresh cucumber wedges into the brine of a store-bought pickle jar, once all of its pickles have been eaten. (But better yet, here’s a lovely recipe for Refrigerator Pickles with a homemade brine.)
Jars of pickled things at The Goodland Kitchen, in Goleta, CA.
* It’s nearly summer again and I am finally writing about the pickling part now. Too many recipe posts, too little time!
** Although you can re-use your canning jars and screw rings that fit around the tops, you need to use NEW lids each time you can.
(Print this Pickled Green Beans recipe.)
RECIPE:
Pickled Green Beans
(Slightly adapted from the Canning 101 class at The Goodland Kitchen, Goleta, CA)
(Makes 3 pints)
Ingredients:
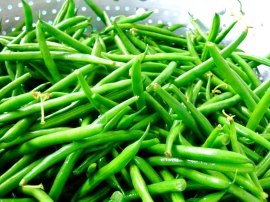
~ 2 lbs. green beans, washed and trimmed
For the Brine:
~ 2 cups vinegar (distilled white or apple cider vinegar)
~ 1⅔ cups water
~ ¼ cup salt
~ ½ Tbsp. sugar (optional)
For the Spice Mixture:
~ 3-4 tsp. dill seeds
~ 3 tsp. mustard seeds
~ 20 black peppercorns
~ 1 small clove of garlic, per jar
~ 1 dried red chili pepper, per jar
OPTIONAL:
~ pinch of cayenne pepper
~ pinch of sugar
~ 1 sprig of fresh dill leaves or flowering tops, per jar, to make “dilly beans”
How to make it:
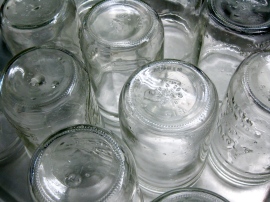
1. Wash jars in hot, soapy water, and rinse well. Put metal jar lids into a pan of water and bring to a boil, then turn off the burner and let the lids stand in the hot water.
2. Bring a separate large, very deep pot of water to a boil. This will be your boiling water bath to seal the jars. The pot should be deep enough that the jars can be fully submerged in the water without the water boiling up and over the sides.
3. Then prepare the green beans: Wash and trim beans until they are a little shorter than the height of your jars. (You’ll want to allow between ¼ – ½ inch of jar headspace.)
4. Prepare spice mix (without the cayenne or sugar) and set aside. Then make the brine and bring to a boil.
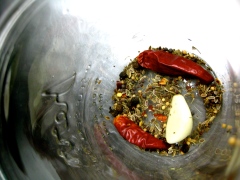
5. Add a heaping tablespoon of spice mix to each jar, making sure that each jar has one clove of garlic, one dried red chili pepper, and optionally, one sprig of fresh dill leaves or flowers. Pack in the beans, standing as tightly together as possible. Optionally sprinkle a tiny bit of cayenne pepper or sugar over the top.
6. Once the water bath is boiling (step #2) and the lids from step #1 have been simmering/soaking in hot water for at least 10 minutes, then you can pour the HOT brine over the jars of green beans, leaving at least ¼ inch of “headspace,” or unfilled area at the top of the jar, right under the lid. Then carefully pick up the hot lids (using a slotted spoon or magnetic canning “wand”), place them on the jars, and screw on the rings over that, but not too tightly.***
7. Immediately, while jars are still hot, transfer to boiling water bath (using canning tongs or hot water gloves; see footnote ***). Make sure each jar is submerged in the hot water, and be careful to keep each jar upright, without tilting it too much. Keep in boiling water for 10 minutes, then remove, keeping jars upright, and let cool.
8. Give the pickles at least 2 weeks or a month to fully develop their flavor before eating them, or store for up to a year!
*** Once you place the heated lids onto the jars, you need to be careful not to screw the rings on too tightly, or else air bubbles won’t be able to escape while the jars are under water: a good trick is to set the jar down, and use only one hand to spin the screw ring around and around until the moment the ring starts to turn the jar below with it. That’s when you know it’s tight enough, and you can immediately transfer the jar into the boiling water bath–- using either jar-lifting tongs or hot water gloves-– while the jar is still hot.
Related recipe posts:
> Canning 101: Strawberry Jam
> Lentil Green Bean Salad with Vinaigrette
Trackbacks
- Fig and Walnut Balsamic Vinaigrette « spontaneous tomato
- Canning 102: Fig Jam « spontaneous tomato
- South Indian Green Bean Curry with Shredded Coconut « spontaneous tomato
- Canning 101: Strawberry Jam | spontaneous tomato
- Whole-Grain Dijon Mustard Potato Salad | spontaneous tomato
- Green Bean Black Sesame Goma-Ae | spontaneous tomato









Delicious! I love pickled things. We can dilly beans and pickled beets every summer.
Nice! I hope you’ll post a recipe for the pickled beets on your blog sometime this summer? Come to think of it, beets might have been one of the other delicious things on the pickle platter I had at that restaurant in Philadelphia.
Pickling and preserving are one of my favourite pastimes. I have never considered pickling green beans before as I usually always freeze them to use when they are no longer in season. I will definitely give this recipe a try.
Great; I hope you like it!
The beans look beautiful in the jars! I’m trying to learn to love pickled things… I haven’t quite gotten there yet, though. I do love preserving…and am super excited for the upcoming months!
What about chutneys or pickled mangoes? I’m excited for the coming months too– I took this canning class at the end of last summer, so I couldn’t really put my new knowledge to good use until summer came around again, and now it’s almost here!
Excellent have always enjoyed your recipes. Can we reblog this blog? How?
Thanks! And yes, I think you should be able to reblog it… (Try making sure you are signed in to your WordPress account, and then click the “Reblog” button in the bar across the top of the screen?)
I need to learn how to pickle! I looooove pickled things. These beans look so good, I’d devour a whole jar.
It’s easy; you should try it! You can always start by making just a small batch of refrigerator pickles…
This sounds like a fun project! And perfect for the abundance of green beans that are about to come. LOVE dilly beans so am going to add some dill to this.
: ) Me too; the next time I make it, I am definitely adding some fresh dill!
I want to start pickling soon. This was awesome information. Thanks for sharing! :)
You’re welcome! Hope you can check out the Strawberry Jam Post too, even if you’re more interested in pickling than jams (like I am)… just because it has a more complete explanation of some of the canning basics that were covered in the canning 101 class I took (about hot water bath canning, etc.).
I’ve never thought of pickling beans, but this looks so good , i’ll try it!
Hope you like them! : )
Very nice, just picked my beans, whipping these up tomorrow evening. Thanks a bunch.
C.
Awesome! I’m so glad to hear it; hope you enjoy. :)
(I’ve already been trying to plan out a weekend sometime this summer when I can make a brand new batch of my own!)
I didn’t quite have enough brine for 3 pints, so had to make more. Not a big deal, but other folks trying it may want to increase amount from the start. Can’t wait to try them! 2 weeks will be long!
Hi Nancy, thanks for your comment!
That has not happened to me with this recipe, but a similar thing has definitely happened to me with jam, so I know how that goes. I often leave the jam simmering long enough that it makes one or two fewer pints than I’d wanted it to… So if you brought the brine to a full boil for 10 whole minutes (or—come to think of it—if you didn’t pack the jars quite as full of green beans as I did), then I can understand how there was not quite enough brine.
Anyway, since this recipe calls for just enough (or maybe not quite enough) brine, I think your advice is good to just increase the brine amount a little from the start!
This is an awesome recipe, it is delicious. However, either your measurements or your recipe is wrong. You say to put a heaping tablespoon of the spices in each jar. Yet the recipe calls for 3 to 4 tsp of dill seed and 3 tsp mustard seed, plus 20 peppercorns. None of this adds up to 1 heaping tablespoon per jar. 4 tsp makes 1 tblsp. Not enough tblsp for 3 jars. Maybe you meant heaping tsp per jar. But I increased everything to allow the 1 tbsp per jar and they are totally addictive.
Oh and by the way, you should NOT put the lids in boiling water, you should put them in slightly less than boiling water. Where you just see simmering bubbles on the bottom